Something BIG is in the works!

Alright, friends!

Here comes the big news... We are starting a RENO! That's right, the first-ever, complete renovation of any interior room of this house... Which is where it gets interesting. Because the only experience with a reno for this blogger is the ever-glorious yard. Which, in itself was a huge feat! But, in comparison, far less intrusive as a renovation. 

Our plan? Spend less than $5,700 in less than 5 days. Above, you can see the mood board and purchasing list for this project. The only possible way of accomplishing such an affordable reno of a master bathroom is if you are extremely frugal in your purchasing and exceptionally good at negotiating...

Happy to report that thus far, we have been doing pretty well on both accounts. It has been a bit of a give-and-take (as usual) so our ability to save on some items has enabled us to compensate for some mistakes. For example... my math on how much tile we need, as it turns out, was way, way off. But, by saving on the bathroom vanity and the faucets and finishes, we are still within budget.

So, where have we made some changes already?

  1. We have swapped the faucets for the bathroom vanity and the bath tub with more affordable options.
  2. We also changed the bath tub model for the one we were able to see in person.
  3. We found more affordable mirrors (more on that below).

Where did we save big time?

1. The mirrors.

Originally, we had planned for these geometric Umbra mirrors with black frames to contrast the future white walls and complement the wood, grey and white palette. However, during a random walk through our local Target, we came across Dwell's Modern line for Target (ON SALE!). Before we knew it, these two babies were in our cart on the way home.


2. The faucets! 

The original plan had some sleek faucets from Home Depot and Allmodern.com. And as much as we liked those, we found some more affordable alternatives at IKEA and the Home Depot that we got to see and pick up in person!

The best news from our shopping excursions though was the bathroom vanity! We had originally planned to spend north of $500 on that from IKEA. After some back and forth on inventory availability (and minor panic attacks that the centerpiece of the remodel is... um... nonexistent), we lucked out to secure on of the last three vanities in Houston... at half its price! So exciting!!

Okay, enough bragging about the savings. Where are we NOW?

You may think... Hey, this is not a TERRIBLE bathroom... Why change? Well, hold on! Let's show you some close-ups (SPOLER ALERT: not for those who get grossed out easily):

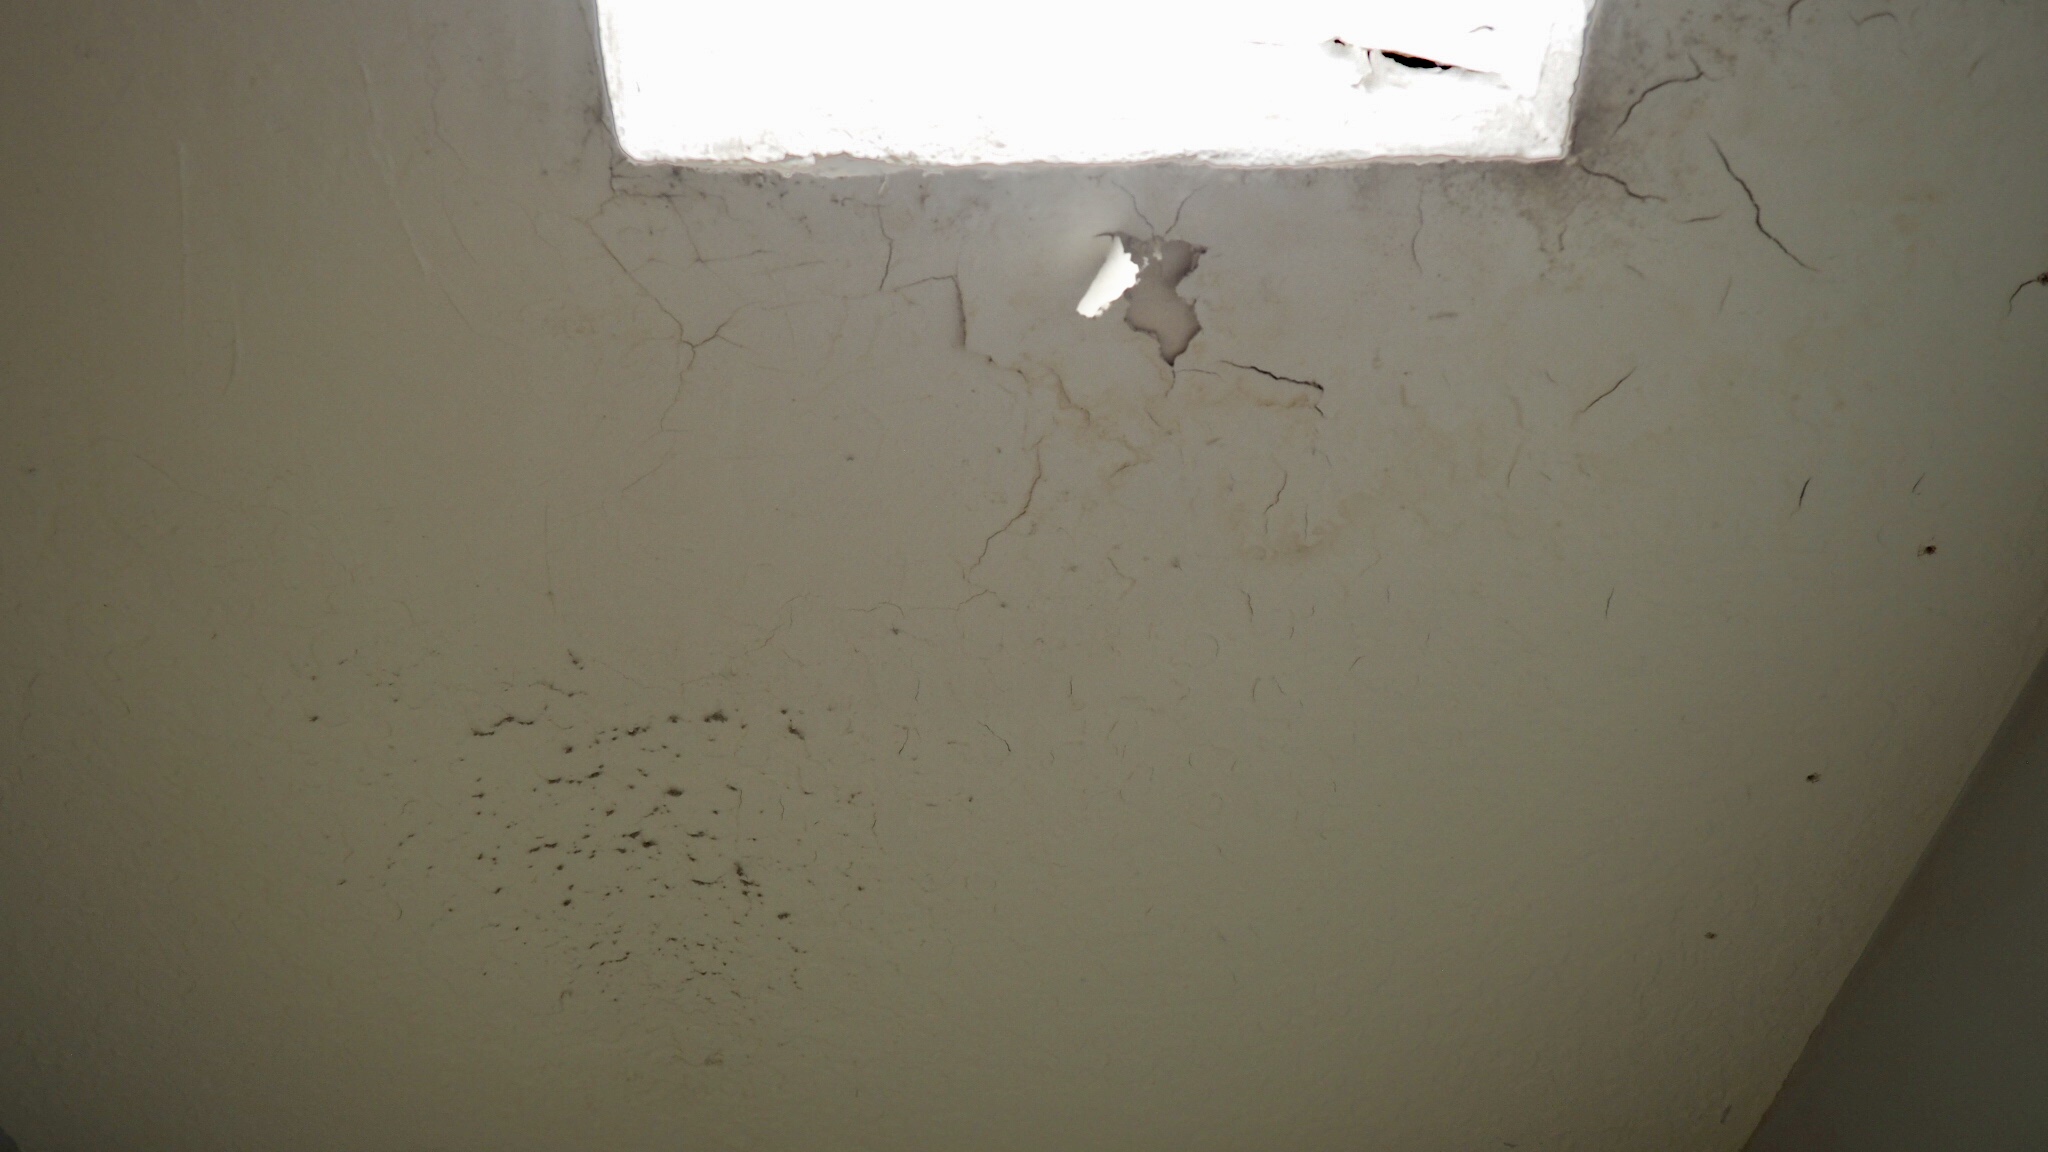
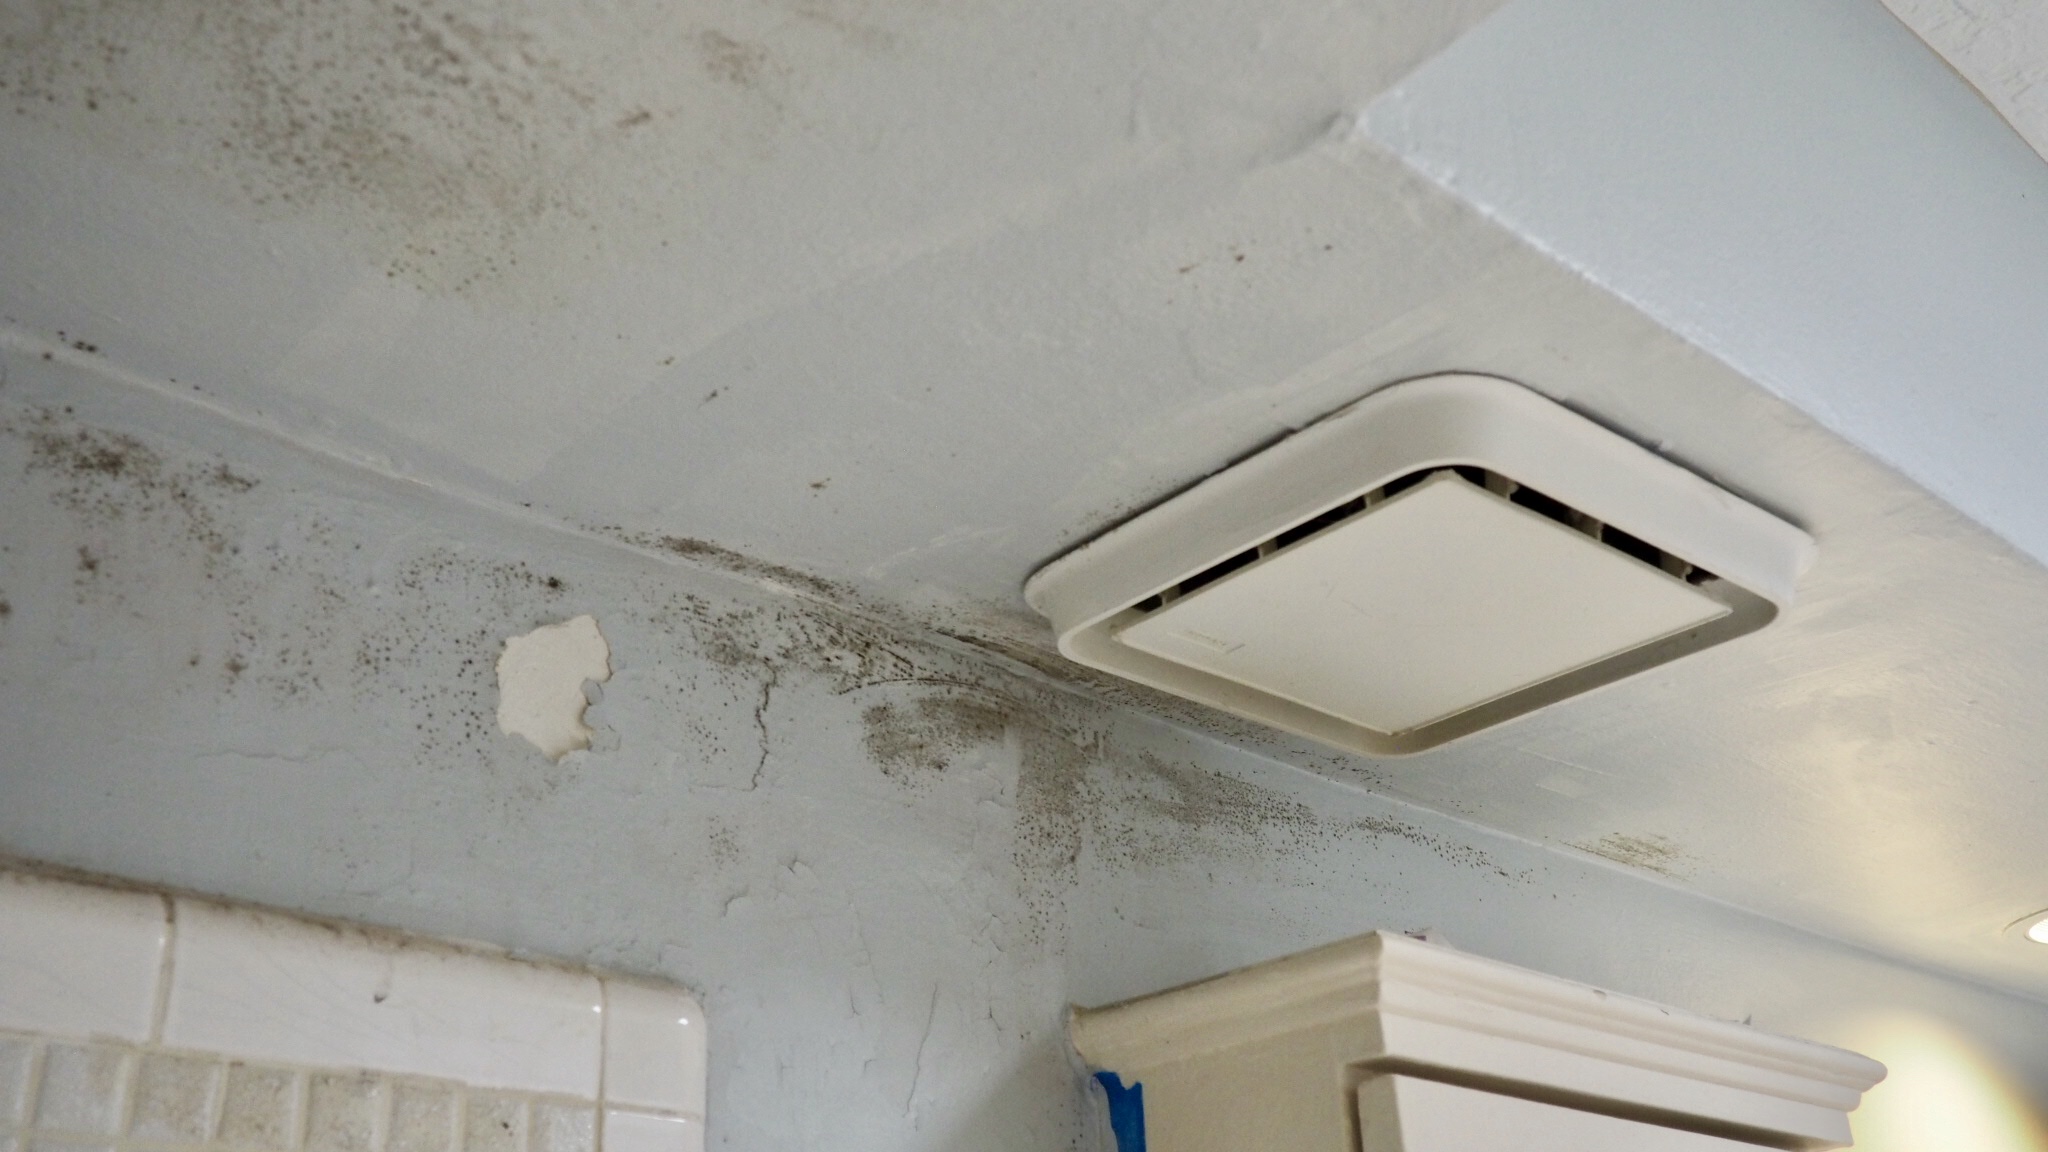
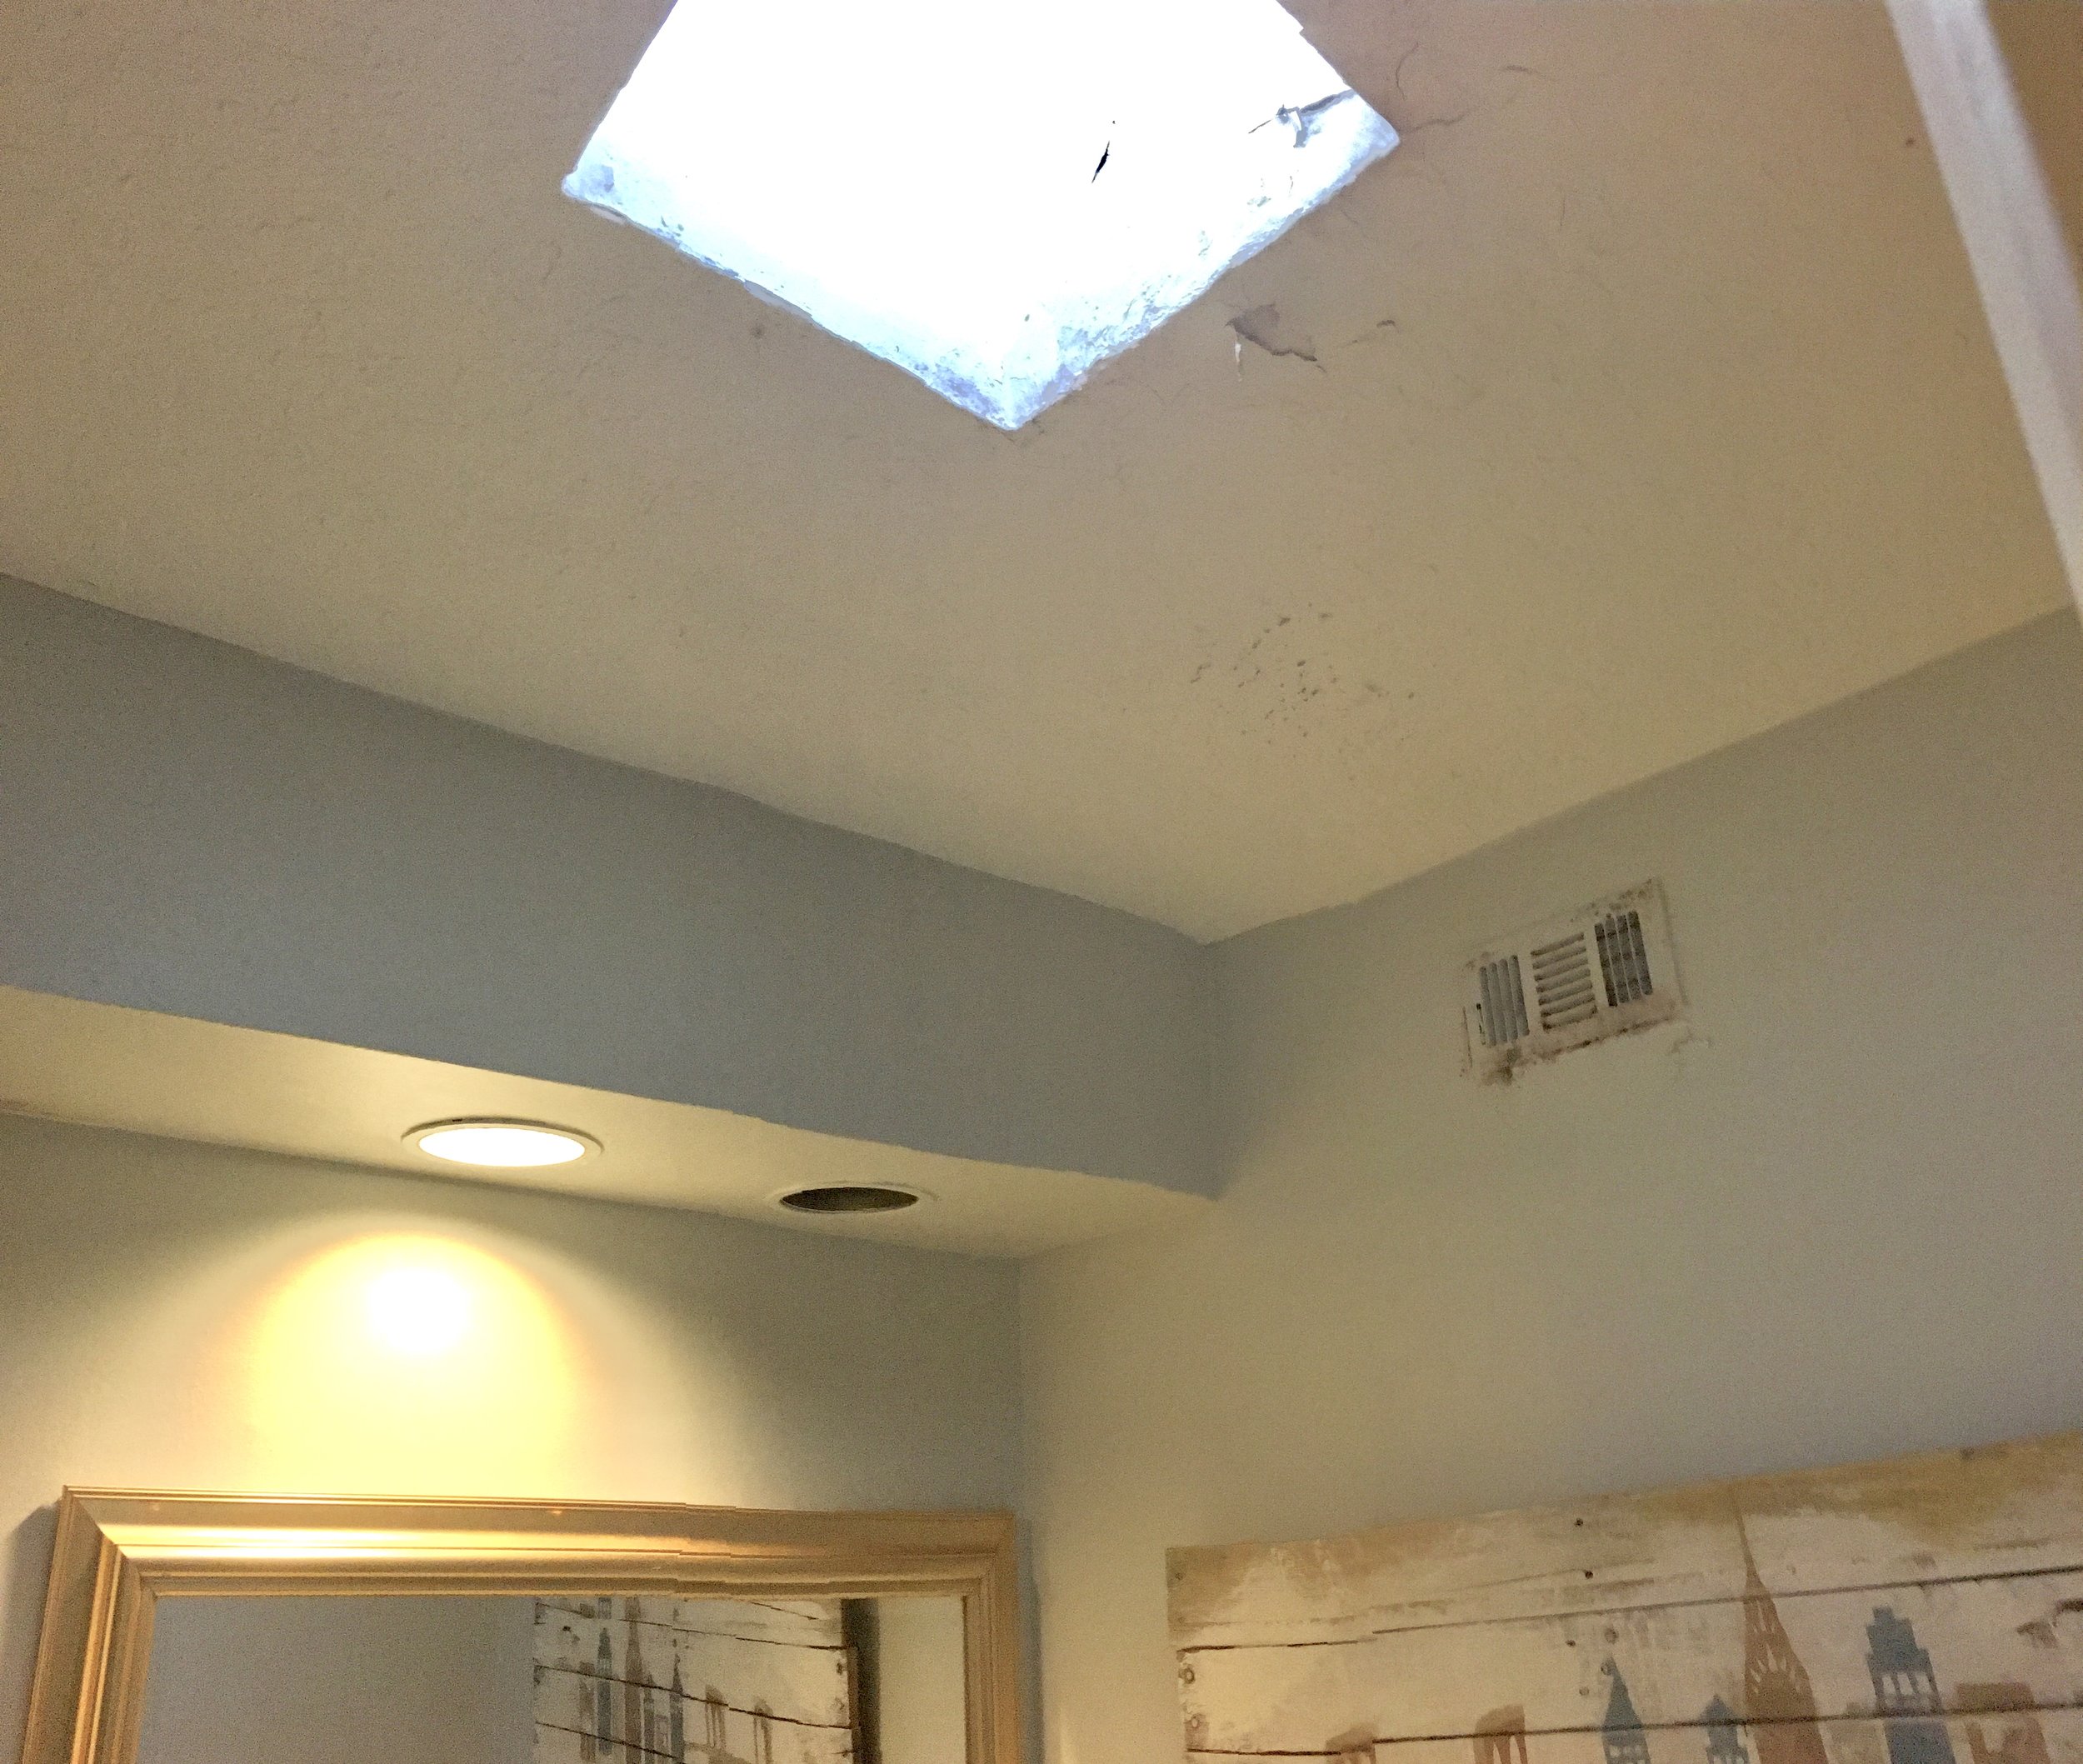
Yup... GROSS. One of our skylights had leaked thus creating some serious leakage and mold. After fixing the skylight sealing, we let the whole thing be... Resulting in this! In addition, it's safe to say that the vent in the bathroom was anything but effective. We are fixing that with a new, powerful fan that should be arriving tomorrow... 

And this is it for now! After today's demo is done... you can expect more images to follow :). Wish us some good luck, please!

Posted on March 20, 2017 and filed under Design + DIY.

A new skill to practice... Watercolors and calligraphy!

Hello, hello, world! 

In between trips to Chicago and DC, I somehow managed to also enroll into a watercolor class (one of the perks of working at a university!). And, what a treat! A mere three weeks into it, I am already addicted to this new (to me at least) art form. A mere three weeks into it, and I am already wanting to share my experimentations with you! 

Granted, I have so much to learn still. Gorgeous evidence via this inspiration

Meanwhile, I am just having too much fun mixing up purples and violets! If you are wondering why that is such an accomplishment... a bit of background. In the class I am taking ("Watercolor for All" with Ellen Orseck), we are learning the very basics of watercolor, such as types of brushes, types of paper, color theory, etc. Therefore, we are sort of stuck with some very very basic colors (think blue, red, green, yellow and some brown).

In other words, there are no violets or purples in there. You have to mix it all yourself! Thankfully, Ellen knows what she is doing. This was one of our first exercises:

A value and hue color wheel, which is a lot harder to make than you'd think! (Aka, I made a few mistakes... which were smartly left off of this image :). But this exercise proved to be the one thing I needed to be able to produce this pretty little card!

As the first image would hint, I also made one card with orange and red flowers... But that was a learning one (ahem, not for a close-up :). So, back to the violet one that I seem to be pretty happy with:

I think I see a lot more of these in my future! :)

Meanwhile, make sure to follow my travel adventures on Instagram! A few more trips planned in the next couple of weeks.

'Tis the season... the azalea season!

Tardy in more ways than one...  

I can't believe I am posting these a year late, but since one of my favorite Houston to-do's is right around the corner, I was inspired to dig through the archives. This year marks the 82nd Annual Azalea Trail. Packaged as an enjoyable and manageable walk through the city, this event hits some of my all-time favorite museum gardens, such as the Rienzi and Bayou Bend. 

These lovely flowers came courtesy of Bayou Bend Collection and Gardens. Where, by the way, you can enjoy one of their sip and strolls, if you so happen to miss the Azalea Trail (which I would highly suggest against! :). 

If I have peeked your interest with these pictures, below are some logistical details, beautifully created by none other than our friends at Papellerie:

Happy Sunday!

Dinner, planned

Have you ever been overwhelmed by the idea of cooking a (nice) dinner menu? I may very well be alone here (I am not known for my cooking skills. That said, I excel at folding laundry and styling the house :). But if there is a slight chance that you are in those same shoes, I wanted to share with you our experience of planning, cooking and eating one of the most delicious dinners we have ever had.

Right here, at home.

Now, none of these recipes are originally mine... All I can attest to is that each one turned out more delicious than we ever imagined!

The total prep and cooking time for this dinner was about 90 minutes (not a terrible time investment). I actually started off with the dessert since I was able to whip it up and put it in the fridge and be done with it. That way, it was also nicely chilled by the time of serving. 

Next, I started on the soup... while that was cooking, I was working on the one-pot wonder. During the 15-minute wait times of the entree, I quickly threw together the mushrooms. 

And voila! There's the order of events. Oh, and savoring every bite was rather wonderful too.

Cheers!


Cream of Cauliflower Soup

  • 1/4 cup butter, coarsely chopped
  • 2 tbsp olive oil1onion, finely chopped
  • 1 leek (white part only), thinly sliced
  • 3 garlic cloves, finely chopped
  • 2 lbs cauliflower, cut into florets
  • 5 cups chicken stock
  • 2/3 cups milk
  • 2 oz Gruyère, coarsely grated
  • 2 tbsp crème fraîche
  • 1 tbsp Dijon mustard 

Heat butter and oil in a large saucepan over medium heat. Add onion, leek and garlic and stir occasionally until tender (7-10 minutes). Add cauliflower, stir to coat in butter, add stock and simmer until very tender (40-45 minutes). Add milk, bring to the simmer, then purée in a blender until very smooth. Stir in Gruyère, crème fraîche and mustard, season to taste and keep warm. Original recipe here


One-Pot Chicken, Quinoa, Mushrooms and Spinach

  • 6 boneless, skinless chicken thighs, trimmed
  • ¾ tsp crushed, dried rosemary
  • ½ tsp smoked paprika
  • ½ tsp salt
  • ½ tsp ground pepper
  • 2 tsp olive oil, divided
  • ½ yellow onion, chopped
  • 8 oz. crimini mushrooms, sliced
  • 1 cup quinoa
  • 2 cups low-fat chicken broth
  • 1 ½ cups sliced spinach leaves
  • Salt and pepper, to taste

Place the chicken thighs in a medium bowl. Add the rosemary, smoked paprika, salt and pepper, and toss to coat the chicken. Heat 1 teaspoon of olive oil in large nonstick skillet set over medium-high heat. Add the chicken and cook for 2 minutes on each side. Transfer the chicken to a plate. Heat the remaining 1 teaspoon of olive oil in the skillet. Add the onion and mushrooms, and cook until the vegetables are tender, 4 to 5 minutes.

Stir the quinoa and broth into the vegetables. Bring to a boil, then cover, reduce heat and simmer for 15 minutes. Nestle the chicken into the quinoa, and cook (covered) until the liquid is absorbed and the chicken is cooked through, about 15 minutes (total of 30 minutes). Transfer the chicken to a plate. Stir the spinach into the quinoa. Serve with the chicken. Season to taste. Original recipe here. 


Garlic Thyme Roasted Mushrooms

  • 12 oz white mushrooms, stems trimmed
  • 3 tablespoons unsalted butter, melted
  • 2 tablespoons olive oil
  • 4 cloves garlic, finely minced
  • 1 tablespoon chopped thyme
  • 1/2 tablespoon garlic powder
  • Pinch of salt, or to taste
  • 3 dashes ground black pepper
  • Pinch of cayenne pepper
  • 1 tablespoon lime juice
  • 2 tablespoons bread crumbs

Preheat oven to 400F.

Heat up a skillet and add the butter, olive oil. Add the garlic, thyme, garlic powder, salt, pepper and lime juice. Saute to combine well before adding the mushrooms. Stir the mushrooms to coat well with the ingredients. Sprinkle the breadcrumbs on top of the mushrooms.

Transfer the skillet to the oven and roast the mushrooms for 12 minutes. Serve immediately. Original recipe here


Strawberries Romanoff

  • 12 cup sour cream 
  • 3 tablespoons brown sugar
  • 1 tablespoon cognac or 1 tablespoon vanilla
  • 12 cup heavy cream
  • 3 tablespoons sugar
  • 4 cups fresh strawberries

Mix sour cream, brown sugar and cognac in a bowl. In a separate bowl, whip cream until starts to thicken and add sugar - whip until thick. Fold cream into sour cream mixture and blend well. Serve with fresh strawberries. Original recipe here.


Posted on January 16, 2017 and filed under Test Kitchen.

Travel and design, reunited!

Hello, strangers! Long time, no see!

Before we know it, it's already December, it almost feels like it's fall in Houston (ahem, rainy and below 75F :) and we have arrived at a great spot to share an update of all of our recent trips and the few updates we made to our home!

If you have been following Instagram, you may have noticed it has been a busy few months. In this short timeframe, we managed to travel to Gulf Shores (hello, pretty beaches), Miami (hello, posh beaches), Portland (green, green, green!), Seattle (rain...) and Vancouver (even more rain...)! And, in doing so, we have been experimenting with different ways of commemorating the places we visit... Because it seems we are rather nostalgic and sentimental when it comes to travel memories and pretty pictures just don't cut it :).

So, while browsing one of the many museum gift shops we visited (yup, we love these... sometimes better than the museums themselves!), we came across the above incredible novelty... A kind-of-a-globe! But so much better!

So... we started a thing:

This concoction of organic paper, fun watercolor markers (to shade the countries we have visited) and white calligraphy (to showcase the cities in each country we visited) seems to be just the perfect fit for chronicling our adventures! 

Some of our favorite spots for each city are shown below... And, with all good intentions, I do hope to be able to take you on a quick tour of each... In due time!

Portland


Seattle


Vancouver


And just because I really can't help but wanting to share... Other favorite outtakes from the trip! But, more on that later! :)

And... to finish off, there is one more, rather more indulgent and logistically challenging way of keeping up with our travels... Starbucks mugs!! Yes, we haul these from all over! In fact, I can recall carrying at least two of these beauties in my backpack on our way back from Vancouver! 

And, I have a suspicion we may be adding one more of these before year-end!! Let's hope we don't freeze in the process...

Happy Sunday, everyone!

Posted on December 4, 2016 and filed under Design + DIY, Travel Diaries.

Fall colors, the white way

There seems to be a running joke in this household.

"Sure, honey, you can choose any color you like.

As long as it's white." 


Yes, yes, white is quite abundant around here. But how can you blame us? First, there are an infinite versions of this color (and I am convinced that this household represents at least 94% of those). Second, it looks clean, bright and it forces you to get creative with texture so it's not a COMPLETE snooze.  

All that said, welcome to our version of fall decoration: a healthy amount of white and pale yellow gourds neatly (rather randomly) stacked in a glass container. It still feels like fall and it still fits this home. And, check out all those funky shapes and sizes! So much fun to put together and photograph! 

I think it's completely unnecessary for me tell you how easy this is to put this together (buy gourds varying in size, color and shape and insert into said glass container)... So instead, let's just thank Trader Joe's for their awesome and affordable decoration supplies and wish you one very happy Sunday!

Posted on October 30, 2016 and filed under Design + DIY.

How I built my first terrarium!

This terrarium is a desperate attempt at adding some greenery to the house without running the risk of killing the plants! Because, as it turns out, a closed terrarium is supposed to be a self-sustaining ecosystem. Let's hope it lives... I will make sure to update you if it doesn't :). 

So this is how this project started... With a bunch of pretty clear containers, some plants, and a terrarium kit:

And, as it turns out, making a terrarium is rather easy:

STEP 1: River Rocks


STEP 2: Active Charcoal


STEP 3: Potting Soil


STEP 4: Soak your sheet moss and apply.

STEP 3: Plant your goodies.


And, lastly, cap it off and enjoy! 

Easy, breezy, and rather pretty!

Happy Sunday crafting, everyone!

Posted on September 18, 2016 and filed under Design + DIY.