New Series Alert—If I could, I would…

Dear friends, here is a hypothetical question for you. If you could design an outdoor lounge area from scratch, what would it be? And, since this is a hypothetical question, there is no catch: you have no budget or space limitations…

This was the kind of question AllModern posed to me a few weeks ago. And I got giddy! Are you kidding? I get to play imagination creation?? YES, please! I guess this is the online version of window-shopping these days? I am not sure if I am alone on this (if I am, please do not tell me), but one of my ABSOLUTE favorite things to do is window-shopping, because I am rather shy about purchasing anything… it takes me forever to commit. What’s brilliant about digital window-shopping though is that I can actually safely try things out!

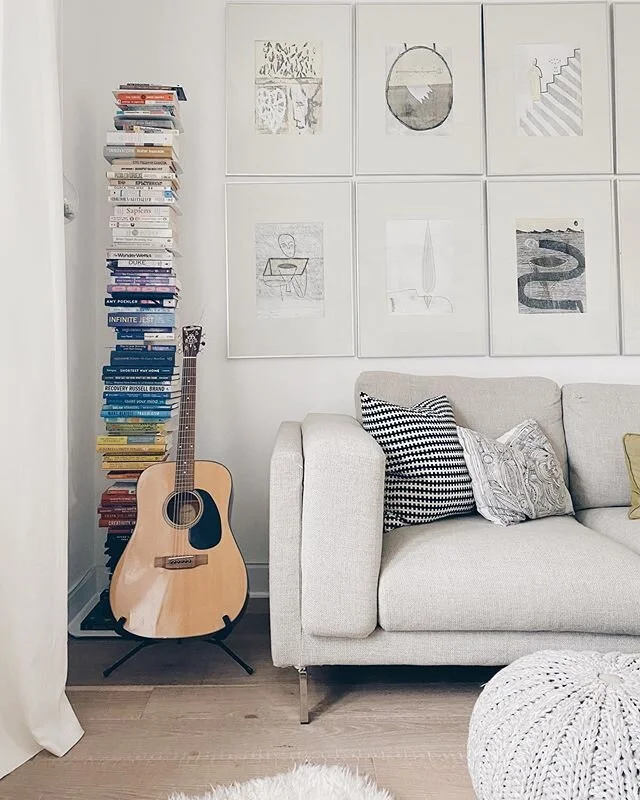
So… here comes the imagination part. Back in Texas, we lived in a house with a lovely patio that brought a lot of joy to this amateur gardener. Some evidence here ->.

IMG_6806.JPG

We now live in Washington, DC, where outdoor space is mostly seasonal, and certainly not readily available. We live in a condo building with 7 units. And even though we have a lovely outdoor area, it’s hard to get everyone to agree on what to do with it, other than the very basic chairs and table for the grill. So now, I get to play-pretend of what it COULD be! Perhaps I’ll be brave enough to mention it to our condo association?

I ended up creating two mood boards for the possibilities:

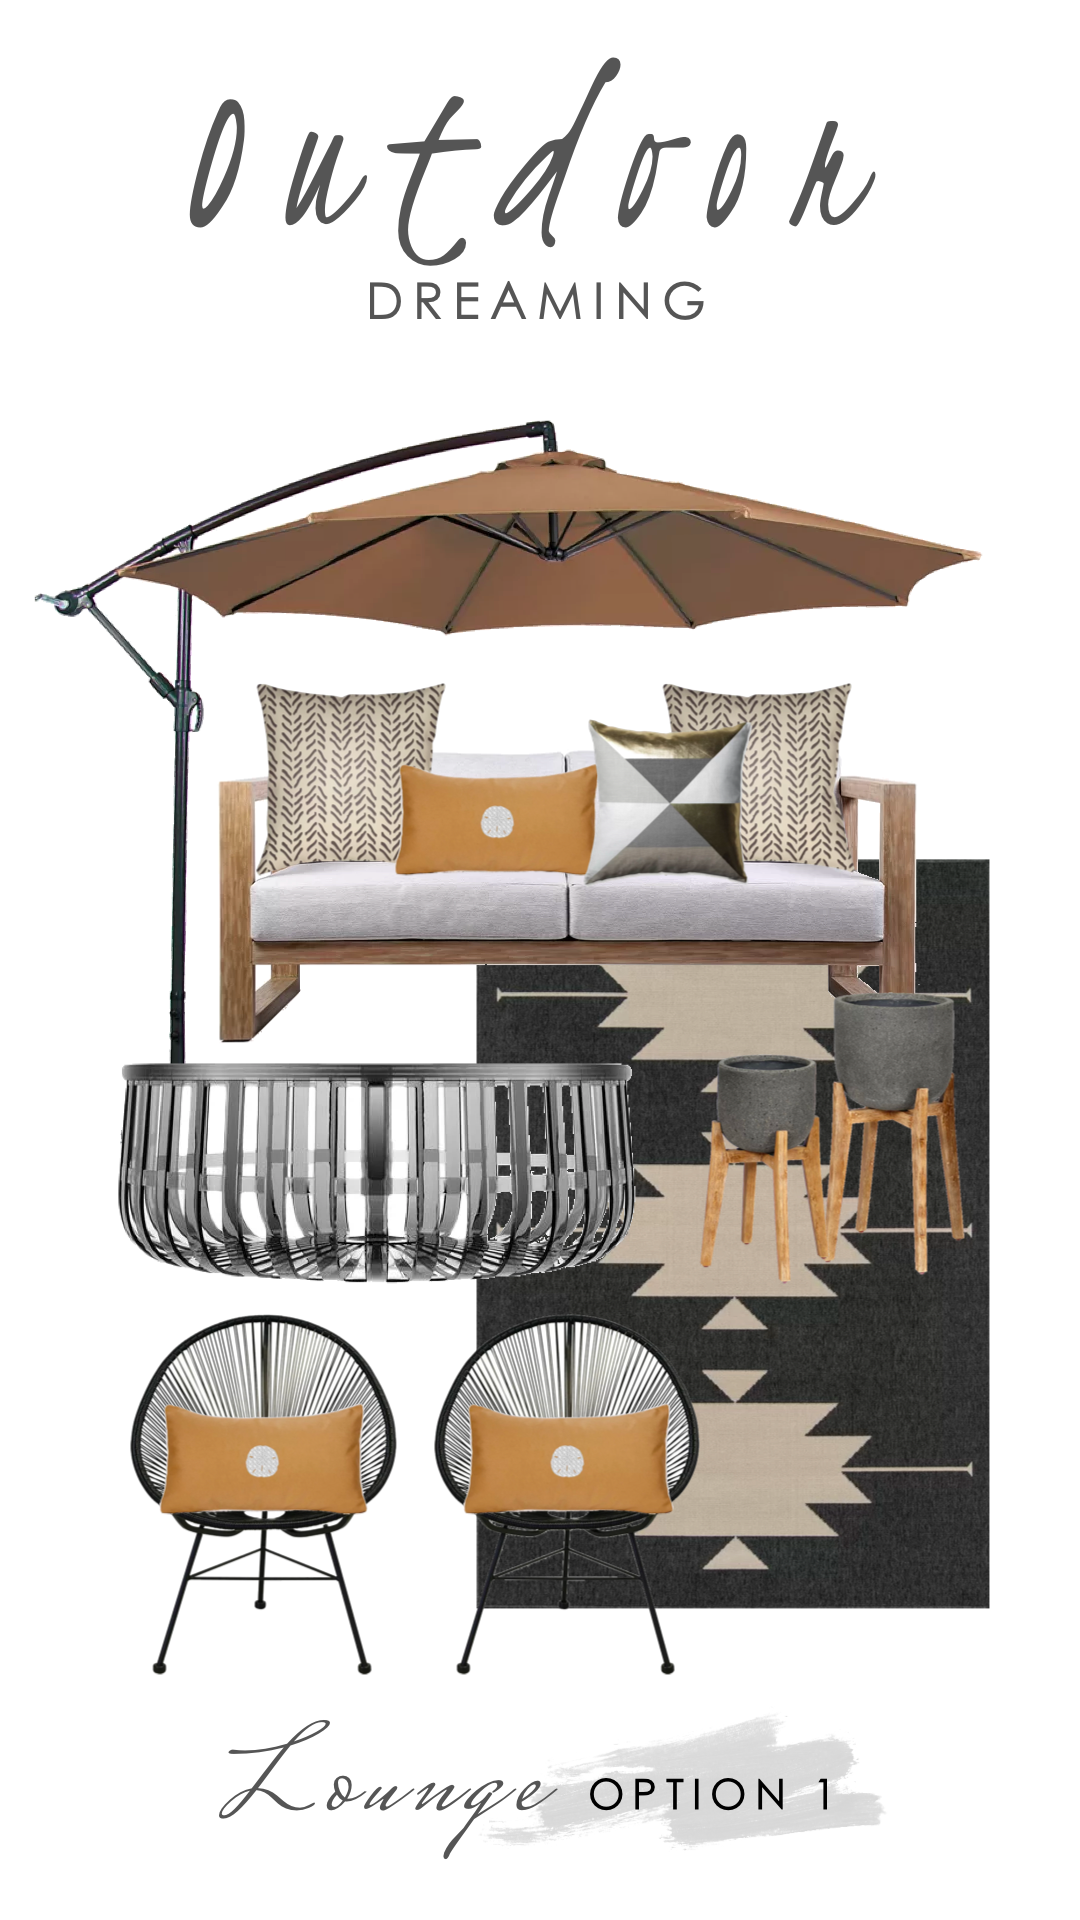
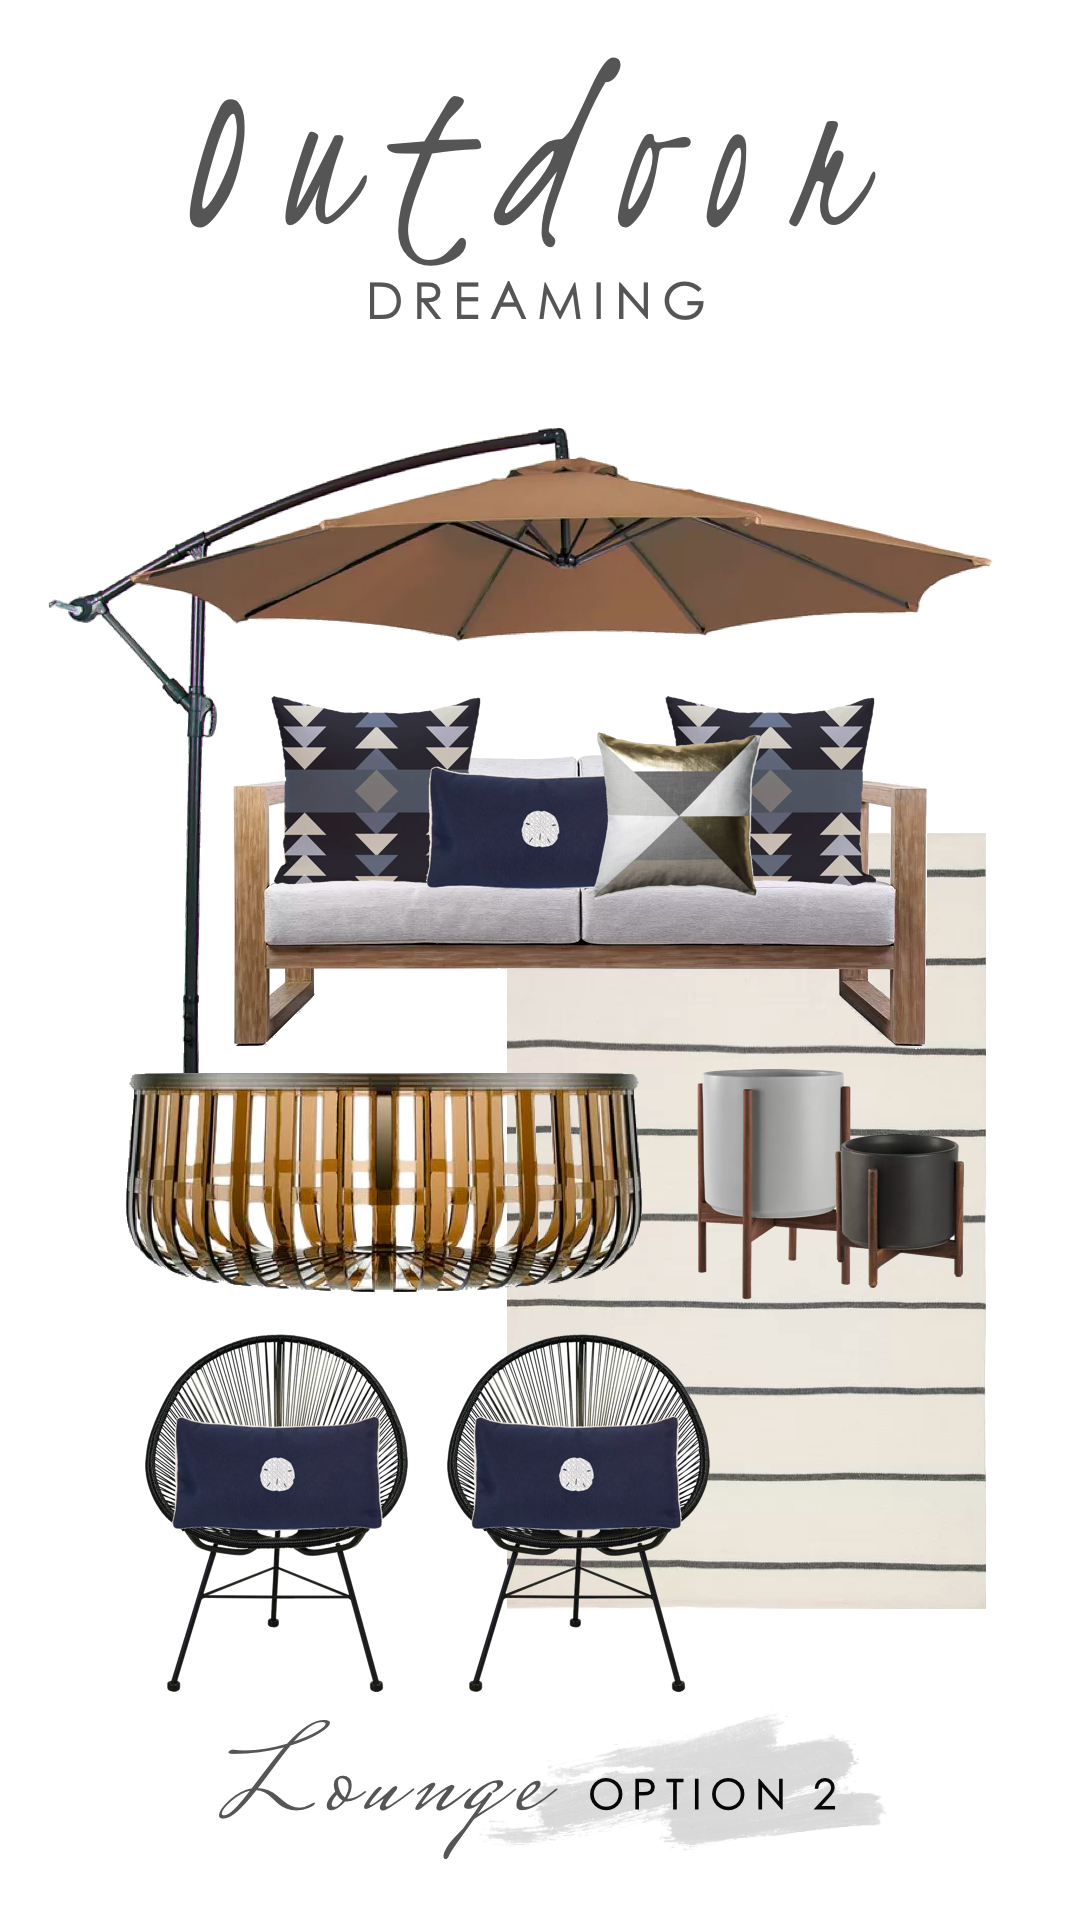
I even put the mood boards to vote on Instagram to see which one was more liked. And…. drumroll… Option 2 was an overwhelming winner with 64%! Design is a funny thing. I actually did create the mood boards in the same order as I am showing them to you. So, in some way, option 2 was an improvement to option 1 then? Design is an iterative process, I guess! But option 2 is my favorite as well!

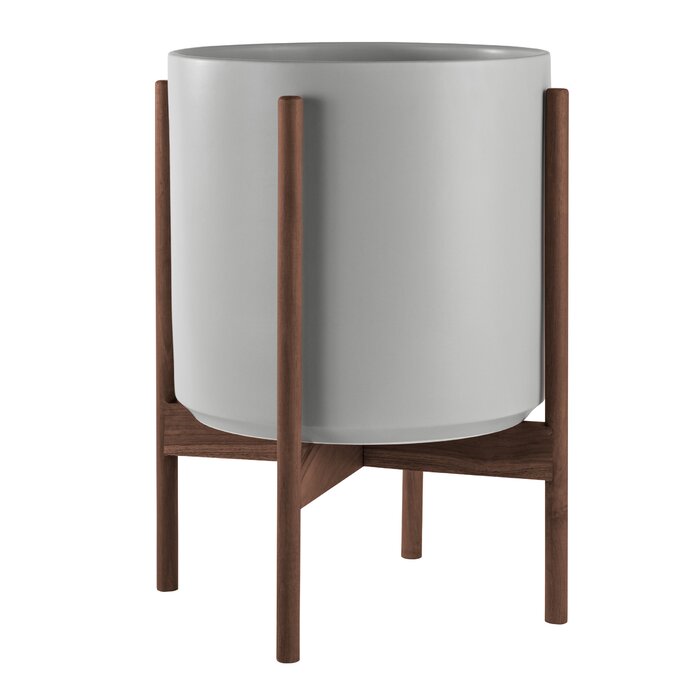
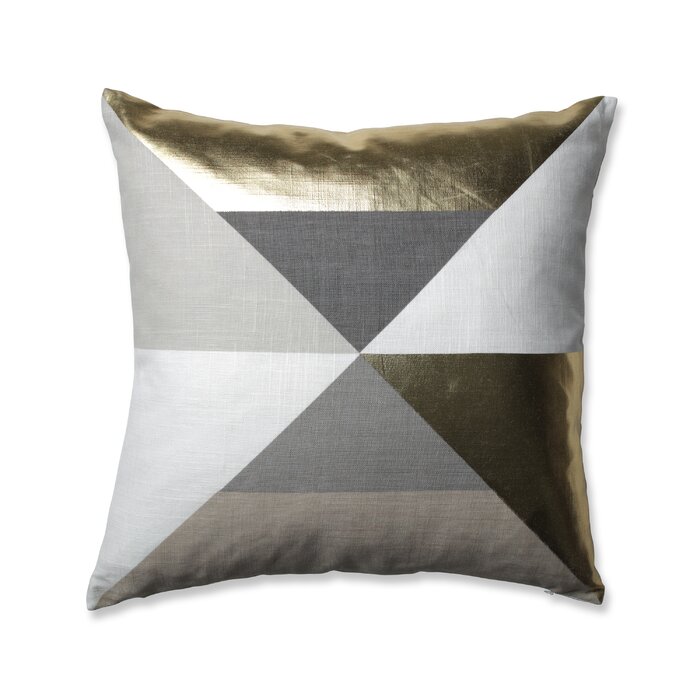
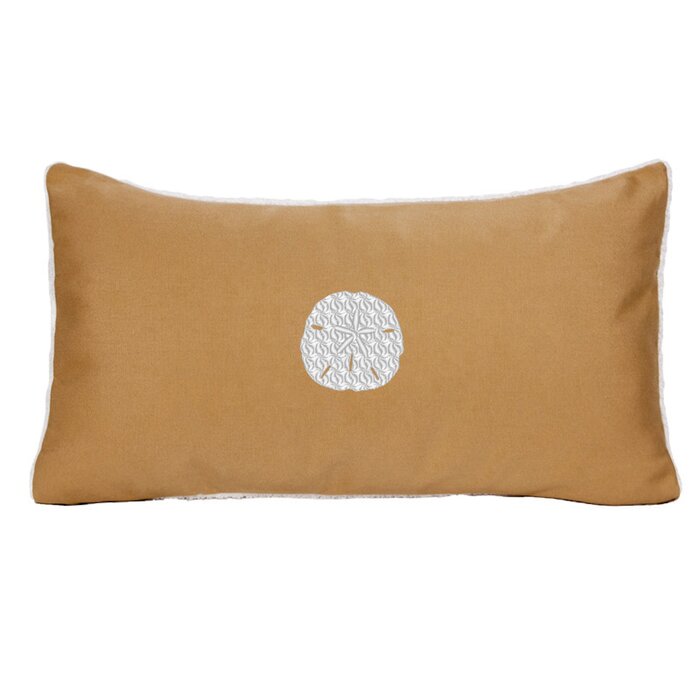
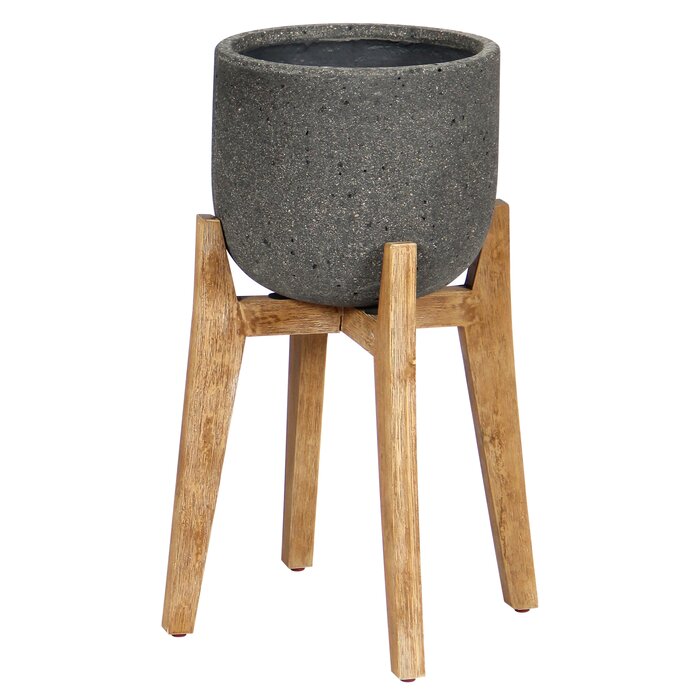
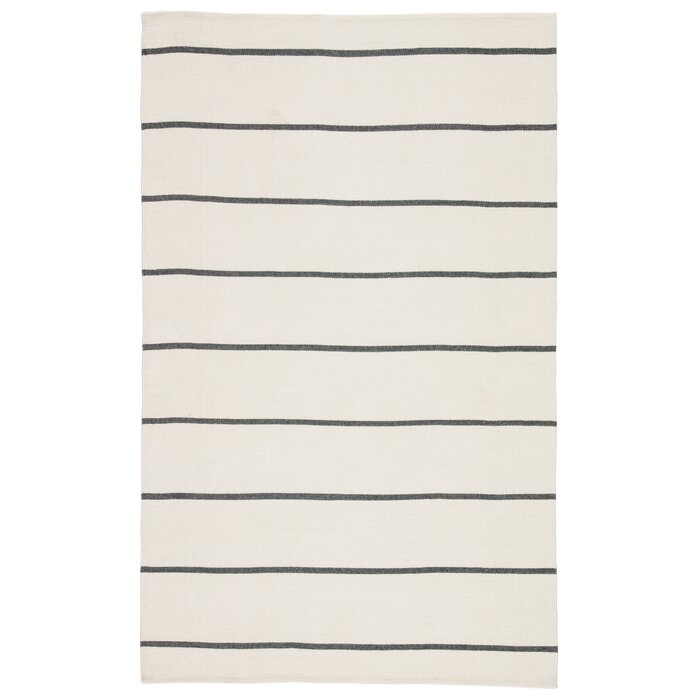
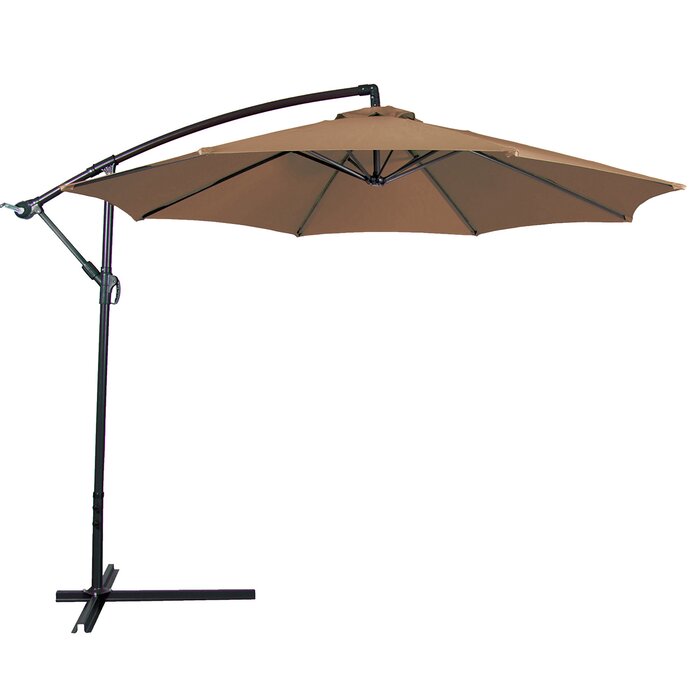
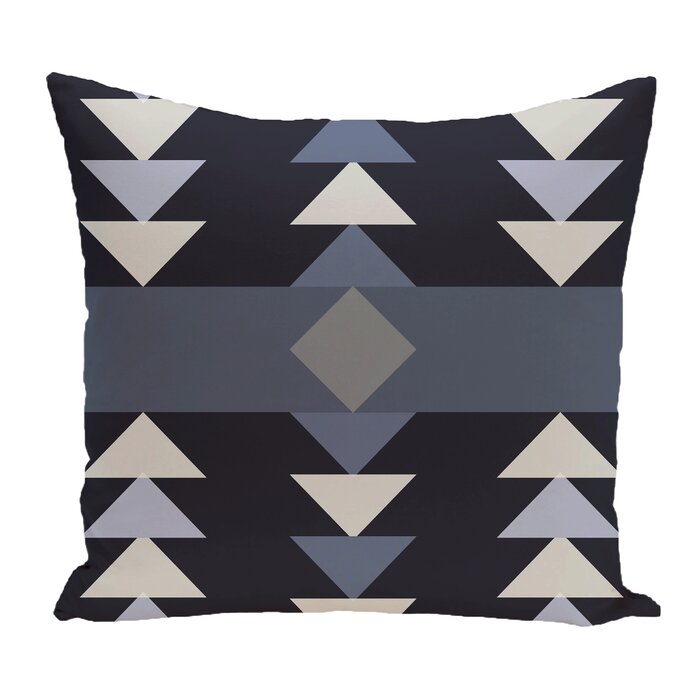
My goal with both of these imagined spaces was to create a comfortable, cohesive space that layered textures and patterns in unexpected but complementary ways. I love mixing patterns and this was no exception. As you can tell, the majority of the elements remained the same between the two concepts. But the small changes in textiles (rug and pillows) made a huge difference! Huge enough to give option 2 a sizable win!

But this exercise also got me thinking. I kind of really like this “if I could, I would” world. So I am thinking about going way beyond my imaginary patio. I hope you follow along. Now it’s your turn!

What do you think? Do YOU have a favorite??

PS: If you like any of the items, I have conveniently linked them all below :D

Posted on April 21, 2020 .

Living the Small Life: Storage (Part 1)

Welcome to my first of what I expect to be very many “small living” posts on the blog!

One of the defining features of our life in DC is the fact that we purposefully chose to live small. Now, when I say small, I do not mean NYC-live-in-a-closet small. But it is a small-ish property. Our dream home is about 900 sq.ft. and we often have to get creative with how we live here, especially given that we share the space with a toddler and a rather large dog. One of the key aspects of small living is learning how to squeeze every square inch into efficient storage.

Which is where today’s post comes in. I wanted to share with you what we did in our second bathroom to maximize our storage there. When we first moved in, this bathroom had a small shelf above the toilet, which was pretty but not exactly efficient:

screenshot-photos.zillowstatic.com-2020.04.16-16_05_58.JPG

So, on my quick to-do list was upgrading this space into some more useful storage! I wanted this storage space to be:

  • Affordable (so no custom cabinetry)

  • Shallow (so that we can still comfortably use the toilet without banging our heads)

  • Closed (so that we can stuff the cabinet with all the not-so-sightly toiletries)

  • Wall-to-wall (if possible)

And a thorough search on the Internet yielded very VERY few options for us. In fact, the only thing that seemed to have potential for us was IKEA’s LILLÅNGEN wall cabinet. But instead of one, we opted to stack four of them together! Thankfully, this cabinet has the option to open the door in whichever direction you want so we were able to have the doors open as if it is one large cabinet!

81D51182-FFBD-450D-BB63-E2D7B88BDCBB.JPG

These cabinets hold a TON! All of our towels live here, as well as all of our medicines (I know, I know, it’s not ideal to keep them there but this bathroom is ventilated very well), all of Robert’s grooming things, plus our extra shower gels and shampoos as well as a bunch of our toilet paper (not bragging on the amount of tp we have here… we just had a ton of tp before the pandemic began because I never learned how to pause our subscription on Amazon :D).

So, if you have some unused space above your toilet, I would highly recommend these cabinets! For less than $200 and a weekend afternoon, we added a ton of much-needed storage without compromising the aesthetic of the bathroom :). I am also happy to report that we have had zero run-ins with the cabinet, which means the depth of it is perfect!

Last but not least, we truly tried our best to align them as close as possible to each other. This is as good as it got, haha. Thankfully, we have come to love the imperfections that come from doing things yourself ;).

Posted on April 16, 2020 .

Social Isolation: Note to Self

Well, well, hello, there!

It’s been pretty much more than a year since I last wrote anything here… Is there anyone out there? Do you still care to read this blog? Can I entice you to keep coming back if I cannot promise to give you regular updates? Hmm…

So here’s the thing. This new “normal” of isolating yourself in your house has presented a rare opportunity for reflection. It has given me enough head space to pause and listen to my inner monologue with curiosity and no distractions. And this monologue is reminding me of what truly feeds my soul—my love for creating, my desire to share and hopefully inspire, and my own seeking of inspiration in others.

Don’t get me wrong, I absolutely love what I do every day at work. It’s work that matters, it’s work that makes a difference, and it’s work that pays the bills. But it’s also tough work and work that stresses me out a lot. It’s work that keeps me moving through every day without much time to pause and be patiently present. So this unintended “pause” is serving a refreshingly good purpose. It’s forcing me to recognize my priorities and rethink how I reengage with the world once our hermit phase is over (and I sure hope that’s sooner rather than later for everyone’s sake).

So here I am, resurrecting an old outlet that gave me immense pleasure before embarking on the journey of motherhood and professional busyhood. As I contemplated coming back here, I was actually shocked to find out my domain had expired… can you believe it? So, first things first, I made sure that works again :).

Next though, in these uncertain times, I will certainly have more time at home. And this blog can present the best place to have some form of a normalcy, right?

Pictured above is our living room, present times. It has changed a LOT since we first bought our place. I’ll be taking you on that journey next.

Until then!

Posted on March 18, 2020 and filed under Be Inspired, Design + DIY.

Welcome to Our New Home!

Shhh….

I write this as both little man and big man are taking a nap and recovering from a fun stomach bug. But with that said…

We did it!

Not only did we became parents in the last few months, but we also managed to purchase a new place, move, and attempt to settle down. And it has been an incredible adventure (ahem, challenge :)!

The Story of Our Place

We had been on the lookout to purchase a new place for quite some time. As soon as we found our rental space, we knew that we eventually wanted to have our own. What we did not know was what we really wanted. We went back and forth on location (such as East Capitol and Dupont), back and forth on size (2 bedrooms? 3 bedrooms? 5 bedrooms for a rental unit??), back and forth on type (townhome? single-family??), and back and forth on timing (I wanted ASAP, Robert… was more cautious, hehe). Ultimately, what worked for us had nothing to do with what either of us expected.

Location

We ended up purchasing our home in Glover Park, happily situated a mere 0.5 miles from both Georgetown and American University. What truly sold us on the location were three key things:

  • We are one block away from one of the best hiking parks in DC, an incredibly appealing thing for these urbanites;

  • We are across the street from one of the best elementary schools in the city;

  • It’s quiet but close to everything.

Size

This was a big one (no pun intended). We really couldn’t quite decide on the size we wanted to purchase. If we wanted to go for three bedrooms or more, we became quite limited in the neighborhoods available and the condition of the homes. Neither of us were ready to tackle a major project with a newborn. So even though we started out looking for a three-bedroom unit, we decided to purchase a two-bedroom unit instead. It gave us enough flexibility to have a kid or two, without slaving away at taking care of a large house.

Type

A surprise here too… we were dead-set on buying a townhome. Until the word of the wise came through in suggesting that we consider a condo instead. Why a condo?

  • Maintenance - it is a breeze compared to owning a house. No roofs to worry about, no stucco to worry about, pretty much there is nothing to worry about other than the occasional appliance trouble (looking at you, dryer).

  • Living Small - an aspiration of mine that is finally realizing! I have grown incredibly tired of stuff. Thankfully, Robert is on board with this one. So we have methodically been getting rid of stuff we do not need or use and have become exceedingly picky with acquiring new stuff (baby stuff included).

Timing

That one we did not control too much… In fact, once we saw our condo, we fell in love with it so much, that we were signing the offer and papers while I was in labor… Yup, you read that right! You could say this place is indeed labor of love! :)

There are so many things that make this place special: the views, the layout, the fact that this is Stefan’s first home! But I think I will save that for another time.

In the meantime, I should probably introduce you to our little, perfect Stefan:

After a good 36 hours of labor, I would say that he was well worth it! Pictured here, at about 5 months :). <3

Posted on December 20, 2018 and filed under Design + DIY.

Hello, World! It's Been Awhile! Some (small) Updates to Follow...

First things first, WE ELOPED! 

Let me start by sharing a little bit about our story - it's a pretty simple one. Robert and I met on a Friday, the 13th, and we have been inseparable ever since. We knew we wanted to marry each other on our second date. We also knew we wanted to have kids together on that same date. It was a looooong date but also one of my favorite memories of my life. I was about to hop on a plane to Italy the next morning, and he cut a work trip short to make sure we saw each other before I left. One thing led to another, and before we knew it, we were living together. Some more things happened, and before we knew it, we moved to Washington, DC. 

And through all these adventures, we became a family - a family that supported each other through the good, the bad, and the unexpected. A family that wanted to explore the world together, grow old together, and grow wise together. A family that saw each member as a teammate and a partner. A family that felt like home, no matter where we were.

And, when we decided to actually get married, we wanted one thing only: a day for ourselves, where we'd only have eyes for each other and the place we were at. So... we decided to elope! To NYC!

The story of our elopement is quite fun in of itself. But we should save this for some other time. The one thing I would note is... Why doesn't EVERYONE elope? It's amazing! Best decision we ever made! But I am saving this story for another time because...

In other news.... WE'RE PREGNANT! Like, VERY pregnant! 

fullsizeoutput_c90.jpeg

As I mentioned before, we knew we wanted to have kids together on our second date... So, not long after we settled in DC, we decided to go for it! And it wasn't too long before I found myself six weeks pregnant on a trip to Iceland and England. Overall, I have been fortunate to have a fairly easy pregnancy. The short version goes like this:

  • First trimester: a whole lot of nausea and an international trip that didn't exactly make things easier. But it sure gave us plenty of stories to tell one day (such as, chasing the aurora borealis amidst 10-ft waves on a tiny boat...). In other words, I spent it mostly napping.
  • Second trimester: a whole lot of discomfort from a growing belly plus some minor complications that got resolved on their own (these doctors know way more than they should these days). In other words, I spent it mostly on the couch. 
  • Third trimester (so far): I have to say, this has been my best trimester so far. I got my energy back, I got to feel the baby kick (you're kicking me, smalls! like, all the time!), and, for the first time, I got to feel confident that we've got this!

So, this is it! A catch-all, long overdue, catch-up post.

Truly though, what matters is the bottom line, right? 

And the bottom line is... WE'RE HAPPY! And extremely tired (already). 

PS: Today happens to be my birthday. I don't necessarily believe in New Years' resolutions but shall we try to do birthday resolutions? Let's see how that works. My birthday resolution is to resurrect this blog... Fingers crossed, a new baby and a hectic new life don't throw me off too much! 

Happy Tuesday!

My favorite things about Washington, DC... So far

It has now been almost 4 months since we moved to Washington, DC. Below, I quickly share some of my favorites thus far. The things that you won't see here are food places (yum...) or museums. The first will be hard to write about... I refuse to take pictures of my food :). The latter requires a whole dedicated post to itself.

So, without further adieu... My three favorite things in DC! (So far):


1. The Commute

I am sure no one has ever muttered these words before, but I absolutely love my commute to work every day! Unlike in Houston, public transportation here is an integral part of the city and many people take full advantage of it (including me). I am lucky enough to not have to switch buses... and the above images are taken from my daily walk to catch the bus. It is easy on the eyes!

And I never realized how stressful a driving commute can be until I no longer had to go through it. In Houston, I had to drive an average of 30-40 minutes to get to work and from work. This was peak rush hour and inevitably, it resulted in plenty of almost-accidents, honking, swears, and fake road rage... Well, road rage no more! My daily bus commute involves me, my podcasts (NPR One!) and peace and quiet. 


2. The Office

I have noticed that working for universities has many wonderful pluses (vacation, anyone?:), one of which is that typically, your office location is rather beautiful. AU and Kogod don't disappoint. Actually, AU's campus is a nationally registered arboretum! Being surrounded by trees and gorgeous landscape calms the soul, even if you have had a long and tiring day.


3. Local Travel

The East Coast feels so tiny! Aka, very easy to travel! Since we moved here, we have spent time in Maryland, Virginia (Great Falls and Wine Country), Pennsylvania (Falling Water) and NYC. The longest of these trips was our Falling Water trip that took as about 3.5 hours each way... 3.5 hours in TX would barely get you to Austin! Needless to say, Chewie likes joining in on the fun because of that!


So this is it... the three simple joys of our recent move! I am sure there will be plenty more to come :). Have a great Friday!

Posted on November 10, 2017 and filed under Travel Diaries.

Save $2,287 with this DIY!

Well, okay, so you won't really save that much unless you have always wanted to buy a random light but never had the budget for it. What is a random light, you ask? Well, let me explain!

The random light was designed by Bertjan Pot and it has been in the moooi collection since 2002. I have been in love with it since 2010. But that was only because it took me 8 years to discover it. Typically, designers use these lights in large spaces in groupings of 3 or more because they provide a very sculptural design element to tall ceilings and lofts. Here's some evidence:

The light comes in three sizes and two colors: small, medium and large and black and white. And, surprisingly, the process for the real light is not very different from the process of the DIY version:  a resin drained yarn is randomly coiled around an inflatable beach ball creating a translucent 3D fabric. The beach ball is then deflated and extracted from a round opening in the lamp. Sounds simple, right?

Well, it is and it isn't. Let me explain. 

First, for the record, this is version 4.0 for me. Version 1.0 and 2.0 did not succeed because I did not use the correct materials and did not have the patience to finish respectively. 3.0 was a fantastic light that was well loved for a good 5 years. Unfortunately, it met its early demise in transportation to DC. Which brings us to version 4.0! This version had its own challenges, mostly, due to our new location and my lack of desire to drive anywhere... I wanted to make this light entirely with materials bought on Amazon. And surprisingly, this actually worked!

Here's what you'll need (for a total of $66.88!!)

As you will notice, I picked a ball that is 36" in diameter because I estimated that to be the size that would fit best in our breakfast nook. You can choose as big or as small of a ball as you'd like. I had actually purchased a 42" ball originally, but then realized that this light fixture will end up being larger than the dining table under it...

Next disclaimer? This is one MESSY process. Wear something you won't be upset about ruining, and do it in an area you won't be upset about messing up. I did this in our tiny back patio. 

Here are the steps you will need to take:

  1. Inflate beach ball.
  2. Using a sharpie, draw a circle towards the top with a diameter of about 5" or so.
  3. Cover thoroughly in vaseline.
  4. Open wallpaper adhesive (in lieu of resin).
  5. Open yarn roll (but do not unroll).
  6. Submerge said yarn roll in wallpaper adhesive bucket. 
  7. Hang greased beach ball from a high place (I used the cable that holds our string lights).
  8. IMPORTANT: Put on gloves. 
  9. Start coiling soaked yarn around ball in random patterns.
  10. Avoid coiling over your drawn circle. This is the opening you will use to extract the deflated beach ball and change the light bulb later.
  11. NOTE: The first few rounds that set the foundation are the hardest. Once you have a few layers, it becomes a repetitive and rather easy process.
  12. ANOTHER NOTE: This glue holds very well so do not stress if the yarn is not stretched tightly around the ball. It will still hold its shape when it's dry. 
  13. Put as many layers as you would like. I liked mine tightly packed because it serves as a better light diffuser that way. But you don't have to make it as tight. I used the entire yarn ball and all of the glue for 4.0. 
  14. Let dry for at least 24 hours, or maybe more. This depends on your humidity. The more humid it is, the more time it will take to dry. This one dried in about 24 hours. And it was bone dry by that time.
  15. Deflate beach ball.
  16. Attach light kit (I was surprised to see that the small opening on top where I had attached the ball to hang it was stiff enough to hold the light kit without losing the light's round shape!). 
  17. IMPORTANT: Turn off electricity.
  18. Install light fixture at the height you would like, which will depend on your ceiling height. Our ceilings are at least 11 ft high and I therefore installed this at about 40" above the table. 
  19. Turn electricity back on and enjoy your magical new feature!

And this is it! A couple of hours of elbow grease and a few thousand dollars saved later, you will feel as accomplished as ever!

Posted on October 24, 2017 and filed under Design + DIY.